



3-Ingredient Fruit Leather
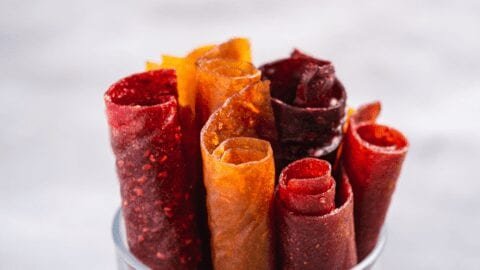
There’s something magical about the smell of 3-Ingredient Fruit Leather drying in your kitchen. After 15 years of perfecting this recipe, I’ve learned that the simplicity and flavor of this treat set it apart. This is the snack my kids request every summer, and once you try it, you’ll understand why. You may also find 3 Ingredient Oreo Fudge useful.
Why You’ll Love This Recipe
- Customizable: Use any fruit puree you like for a personal touch.
- Easy to make: With just three ingredients, it’s a breeze to whip up.
- Healthy alternative: A great way to enjoy fruit without added preservatives.
- Kid-approved: Kids can help make it and will love eating it!
Ingredients You’ll Need
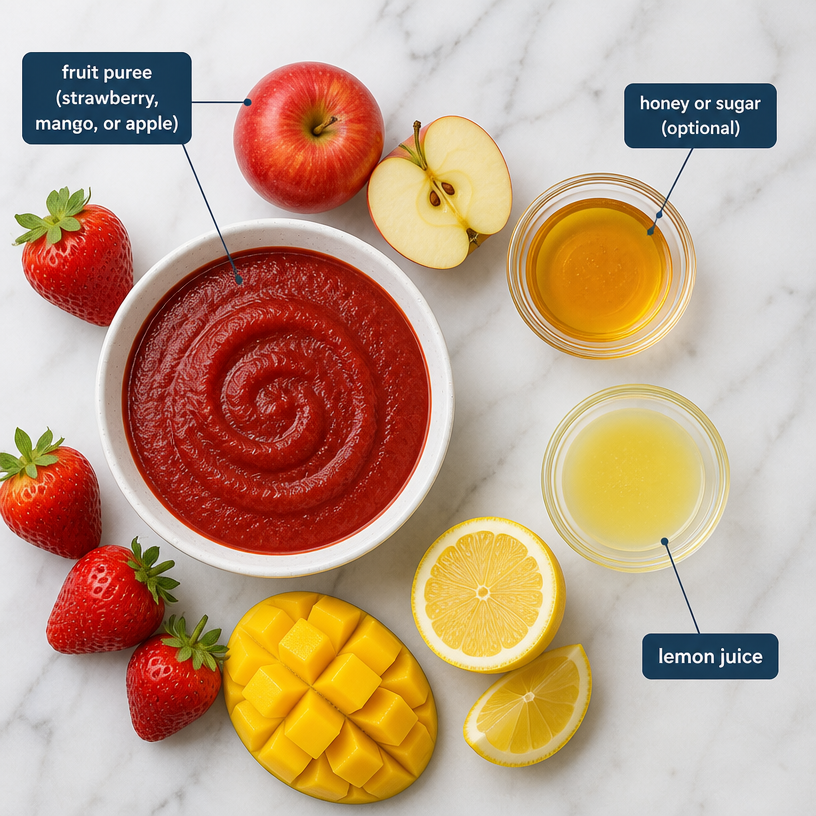
For this 3-Ingredient Fruit Leather, you’ll need just a few simple ingredients that work harmoniously together. Here’s what you’ll require: You may also find Creamy Passion Fruit Dessert With Chocolate Ganache useful.
- Fruit puree — Fresh or frozen fruit works; just blend until smooth. Strawberries and mangoes are my favorites.
- Honey or sugar — Optional, depending on the sweetness of your fruit.
- Lemon juice — This adds brightness and helps preserve the color of the fruit.
See the recipe card below for complete ingredients and exact measurements. You may also find Easy 3 Ingredient Ravioli Bake useful.
Equipment You’ll Need
- Baking sheet — A standard size works perfectly for this recipe.
- Parchment paper — Essential for preventing sticking.
- Blender — To create a smooth fruit puree.
How to Make 3-Ingredient Fruit Leather
This recipe for 3-Ingredient Fruit Leather comes together in just a few simple steps, making it perfect for a quick snack. Follow along!
- Preheat your oven: Set your oven to 170°F (75°C) to prepare for drying the fruit.
- Blend the ingredients: In a blender, combine the fruit puree, honey or sugar (if using), and lemon juice until smooth. This is the secret to achieving a velvety texture.
- Prepare your baking sheet: Line a baking sheet with parchment paper and spread the fruit mixture evenly on top, about 1/8 inch thick.
- Dry the mixture: Place in the oven and let it dry for about 6-8 hours, or until it is no longer sticky, checking occasionally.
- Cool and cut: Once dried, remove from the oven and let it cool. Cut into strips and roll them up to store.
Pro Tips for Success
- Use fresh fruit: Always opt for ripe fruits for the best flavor.
- Don’t rush the drying process: Slow drying retains flavor and texture, so be patient.
- Experiment with flavors: Try mixing different fruits for unique combinations.
Variations to Try
Get creative with your 3-Ingredient Fruit Leather to make it your own. Here are a few fun ideas:
- Mango-Lime Twist: Replace lemon juice with lime juice for a zesty kick.
- Berry Blend: Combine strawberries, blueberries, and raspberries for a mixed berry flavor.
- Peach Melba: Use peach puree and consider adding a touch of vanilla.
What to Serve With 3-Ingredient Fruit Leather
This 3-Ingredient Fruit Leather pairs beautifully with healthy snacks. Here are my favorite pairings:
- Yogurt — A creamy yogurt makes an excellent dip.
- Granola — Enjoy it alongside crunchy granola for added texture.
- Nut butter — Spread almond or peanut butter for a satisfying protein boost.
- Milk — A glass of milk complements this fruity treat perfectly.
Storage & Reheating
Refrigerator: Store leftover 3-Ingredient Fruit Leather in an airtight container in the fridge for up to 1 week.
Freezer: Wrap tightly in plastic wrap, then foil, and freeze for up to 3 months. Thaw overnight in the fridge.
Reheating: If the fruit leather becomes too sticky, place it in the oven at 170°F (75°C) for about 15 minutes to restore its texture. Avoid the microwave, as it may become overly chewy.
Frequently Asked Questions
Can I make 3-Ingredient Fruit Leather ahead of time?
Yes! You can easily make this fruit leather a few days in advance.
What can I substitute for honey?
You can use maple syrup or agave nectar as a sweetener in this recipe.
How do I know when 3-Ingredient Fruit Leather is done?
It’s done when it is no longer sticky to the touch and has a pliable texture.
Can I freeze 3-Ingredient Fruit Leather?
Yes, you can freeze it for up to 3 months by wrapping it tightly in plastic wrap.
Why is my 3-Ingredient Fruit Leather too thick?
It’s likely because the fruit puree was spread too thick on the baking sheet; aim for about 1/8 inch.
Can I double the recipe?
Yes, simply use double the ingredients, but ensure you use a larger baking sheet or multiple sheets.
Final Thoughts
Making your own fruit leather is not only rewarding but also a healthier alternative to store-bought snacks. The mix of flavors and natural sweetness makes this 3-Ingredient Fruit Leather an irresistible treat. I hope you enjoy trying out this simple and delicious recipe!
Conclusion
If you’re looking for more delightful fruit recipes, check out these 3-Ingredient Homemade Strawberry Fruit Roll-Ups or explore the easy fruit leather recipe for more inspiration.

3-Ingredient Fruit Leather
Ingredients
Method
- Preheat your oven to 170°F (75°C).
- In a blender, combine the fruit puree, honey or sugar (if using), and lemon juice until smooth.
- Line a baking sheet with parchment paper and spread the fruit mixture evenly on top, about 1/8 inch thick.
- Place in the oven and let it dry for about 6-8 hours, or until it is no longer sticky, checking occasionally.
- Remove from the oven and let it cool. Cut into strips and roll them up to store.














Leave a comment