

Introduction
The oven hums and the house fills with that roasted-chile scent—warm, a little smoky, and impossibly comforting. Right away, I think of Stuffed Chile Enchiladas, bubbling with cheese and soft tortillas, and this always takes me back to Sunday dinners. First, I like to roll the filling while a pot of coffee brews. Also, if you want a chicken-packed version, I often refer to my trusted chicken enchiladas notes for timing and layering tips.
Why You’ll Love This
- It’s cozy and cheesy with a gentle chile kick.
- It’s quick to assemble for a weeknight dinner.
- It stretches beautifully for leftovers or a small crowd.
- It’s forgiving—use corn or flour tortillas and swap fillings.
Quick Recipe Snapshot
- Servings: 4 (about 2 enchiladas each)
- Prep time: 20 minutes
- Cook time: 35 minutes
- Total time: 55 minutes
- Skill level: Easy
- Taste: savory + tangy green chile, melty cheese
Warm confidence: You’ll feel proud serving these—simple steps, big flavor.
Ingredients You’ll Need
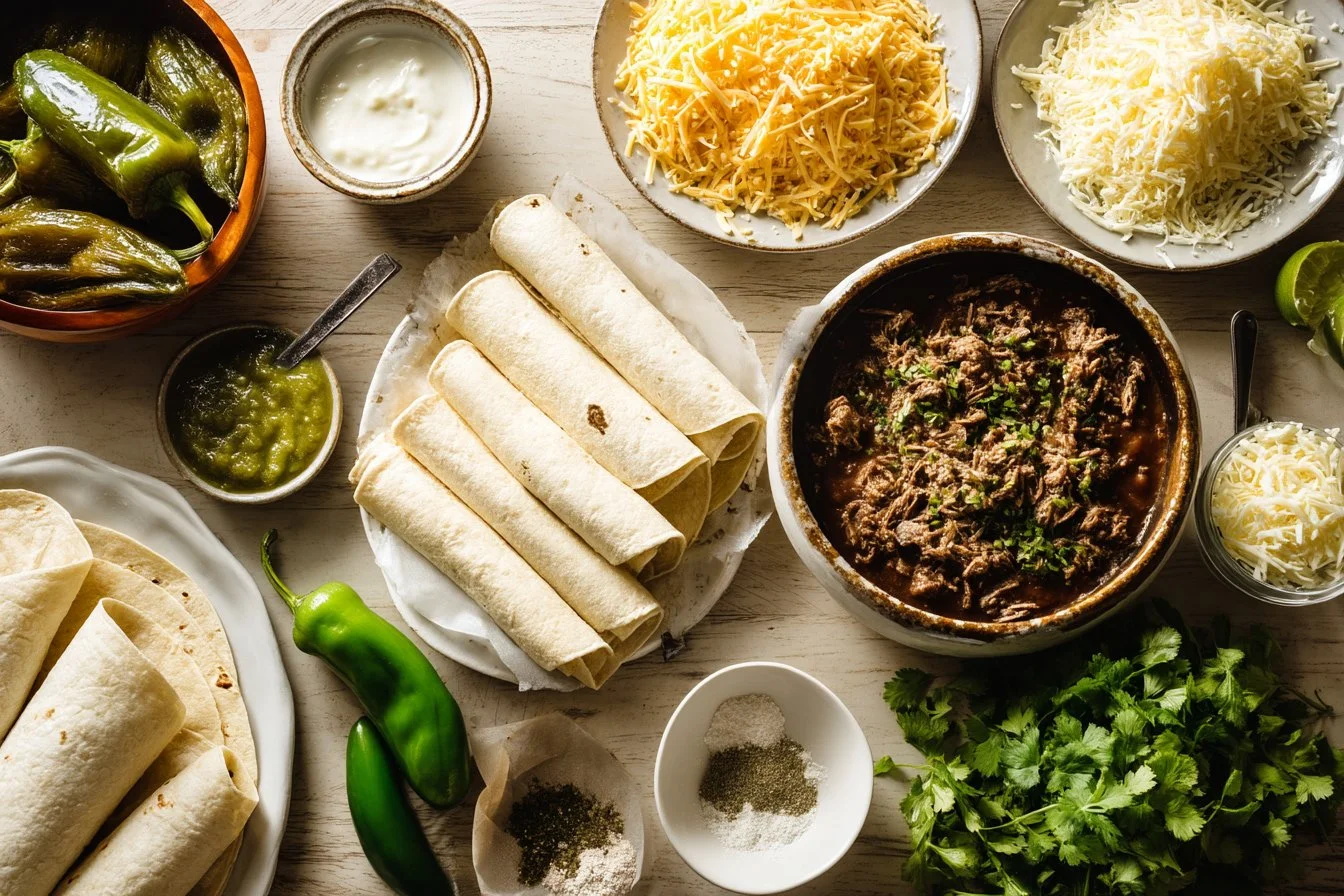
- 8 flour or corn tortillas
- 6 roasted green chiles, peeled and seeded
- 2 cups shredded Monterey Jack or cheddar cheese
- 1 cup cooked and shredded chicken or ground beef, optional
- 2 cups green chile enchilada sauce
- 1/2 cup sour cream
- 1/4 teaspoon cumin
- 1/4 teaspoon garlic powder
- Salt and black pepper, to taste
- Fresh cilantro, for garnish
Chef notes:
- Use fresh chiles for best aroma.
- Sour cream smooths the filling texture.
- Shred your own cheese for better melt.
- Warm tortillas briefly to prevent tearing.
How to Make It
- First, preheat the oven to 375°F (190°C). Let it reach temp before baking.
- Then, in a mixing bowl combine roasted chiles, shredded cheese, cooked chicken or beef (if using), sour cream, cumin, garlic powder, salt, and black pepper. Mix until it feels creamy and evenly seasoned.
- Next, spread a thin layer of green chile enchilada sauce in the bottom of a baking dish so the enchiladas won’t stick.
- Meanwhile, warm the tortillas in a dry skillet for 10–15 seconds per side; they’ll roll without cracking.
- Place a generous spoonful of filling in each tortilla, roll them up, and lay seam-side down in the baking dish. You’ll hear a quiet hiss if the tortillas were hot—good sign.
- Then pour the remaining green chile sauce over the top, smoothing it with the back of a spoon. Sprinkle extra cheese if you like a golden top.
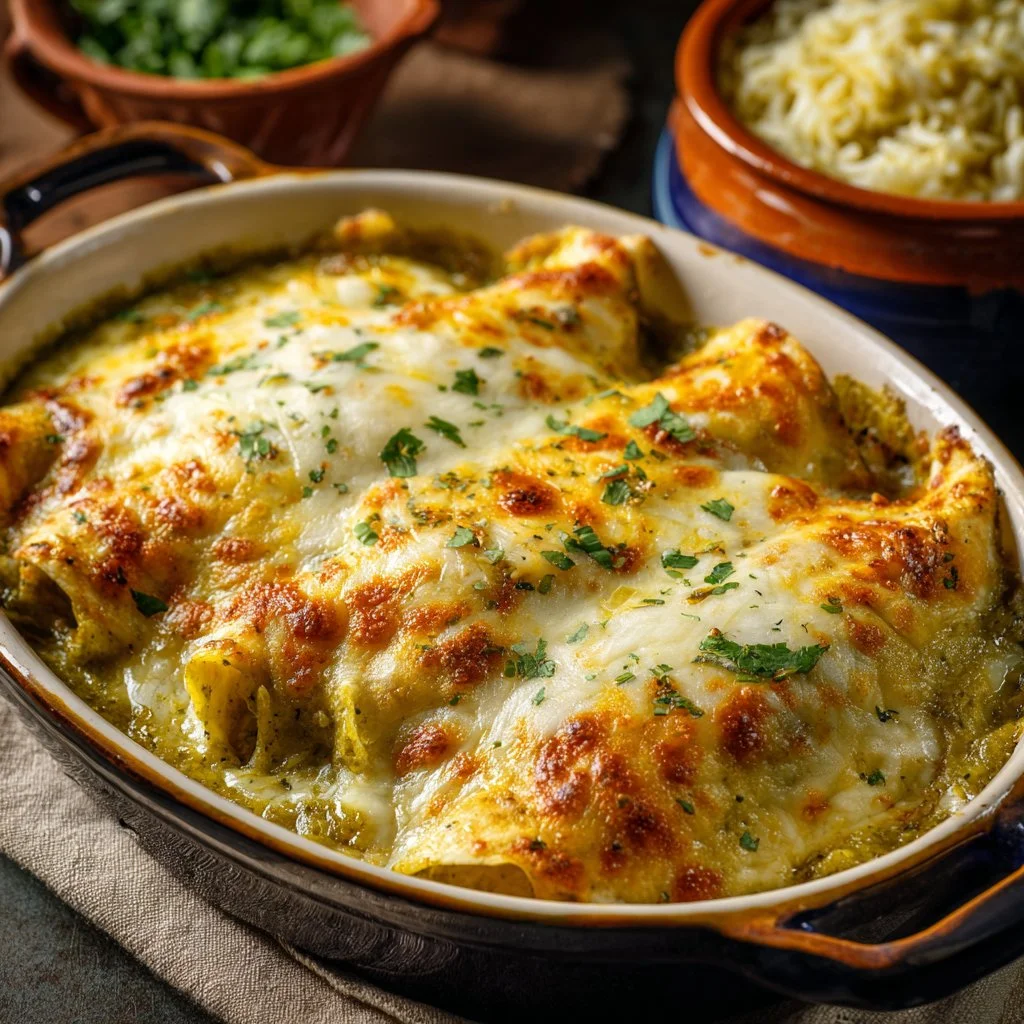
- Finally, bake for about 35 minutes, until the sauce bubbles and the edges of the tortillas get slightly golden. You’ll see cheese bubbling through and the aroma will tell you it’s done.
- Remove, garnish with fresh cilantro, and serve hot.
Also, for a morning or brunch spin, try a quick egg-and-chile addition inspired by my scrambled eggs with lime and green chiles—it brightens the filling wonderfully.
Kitchen Tips (From My Kitchen)
- Time-saver: Roast extra chiles and freeze in a bag for future batches.
- Common mistake + fix: Overfilling tortillas causes splitting; use slightly less filling and press gently as you roll.
- Simple variation: Stir chopped roasted corn or chopped cilantro into the filling for texture.
Serving Ideas
- Weeknight dinner: Serve with a simple green salad and lime wedges.
- Brunch twist: Top a single enchilada with a fried egg and extra cilantro.
- Small party: Cut into portions and offer a toppings bar (pickled onions, avocado, crema).
- Holiday side: Pair with roasted sweet potatoes and black beans.
Garnish ideas: sliced avocado, pickled red onions, or extra crema.
Also, for a playful brunch pairing, consider my scrambled eggs with lime and green chiles to echo the flavors.
Storing & Leftovers
- Fridge: Store in an airtight container up to 3 days.
- Freezer: Freeze assembled (before baking) for up to 1 month; thaw overnight before baking.
- Reheat: Warm in a 350°F oven for 15–20 minutes to keep edges crisp.
Leftover idea: Chop and toss into a burrito bowl or a cheesy sandwich.

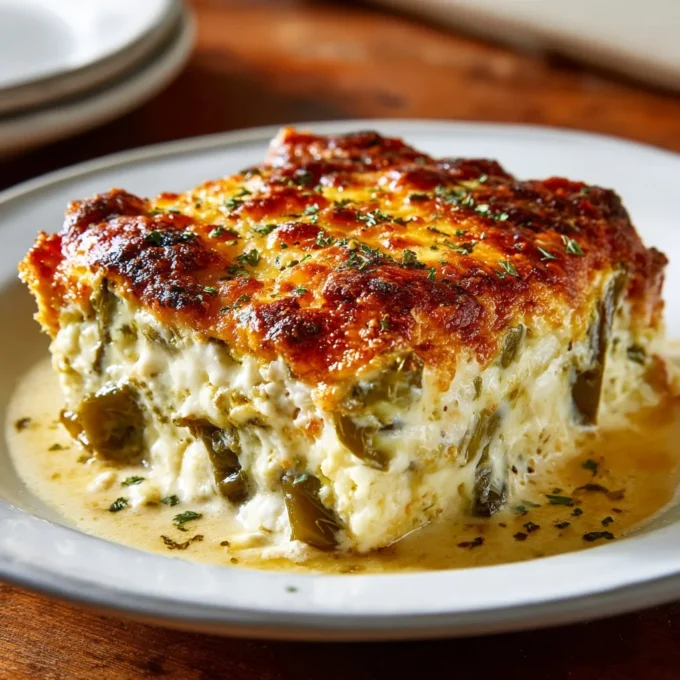
Stuffed Chile Enchiladas
Ingredients
Method
- Preheat the oven to 375°F (190°C) and let it reach the temperature before baking.
- In a mixing bowl, combine roasted chiles, shredded cheese, cooked chicken or beef (if using), sour cream, cumin, garlic powder, salt, and black pepper. Mix until it feels creamy and evenly seasoned.
- Spread a thin layer of green chile enchilada sauce in the bottom of a baking dish.
- Warm the tortillas in a dry skillet for 10–15 seconds per side to prevent cracking.
- Place a generous spoonful of filling in each tortilla, roll them up, and lay seam-side down in the baking dish.
- Pour the remaining green chile sauce over the top and sprinkle extra cheese if desired.
- Bake for about 35 minutes until the sauce bubbles and the edges of the tortillas get slightly golden.
- Remove from the oven, garnish with fresh cilantro, and serve hot.
Notes
FAQs
Q: Can I make Stuffed Chile Enchiladas ahead?
A: Yes—assemble, cover, and refrigerate for up to 24 hours; bake when ready.
Q: Can I substitute ingredients?
A: Absolutely. Swap the chicken for beans or roasted veggies; use pepper jack for extra heat.
Q: How do I know it’s done?
A: Look for bubbly sauce, melted cheese, and lightly golden edges—those visual cues mean it’s ready.
Q: Can I freeze it?
A: Yes, freeze before baking for best texture; bake from thawed for even reheating.
Final Thoughts
I love how this recipe feels like a small, warm ritual—rolling tortillas, the soft hush of sauce, and a kitchen that smells like home. Please try it, tweak the filling to your taste, and tell me which twist became your new favorite; I’m always listening. Stuffed Chile Enchiladas
Conclusion
For a chile-forward spin on a classic, see this take on Easy Baked Chile Relleno Enchiladas for another oven-baked idea. Also, if you’re curious about a gluten-free version, this Chile Relleno Enchiladas [Gluten Free] guide offers helpful substitutions.


Leave a comment