


Introduction
The kitchen filled with a toasty, oniony aroma the minute the oven clicked on. I remember the small crackle when the coating turned golden, and how the first pull-apart petal always gives a little steam kiss. This Baked Blooming Onion is one of those cozy, shareable snacks I make when friends drop by. This always takes me back to Sunday dinners. If you like oven-orange comfort foods, try this easy baked ziti I reach for on busy nights.
Why You’ll Love This
- Crispy outside, tender inside — all without deep frying.
- Kid-friendly and fun to pull apart.
- Budget-friendly ingredients you likely have on hand.
- Quick to prep; oven does the heavy lifting.
Quick Recipe Snapshot
- Servings: 2–4 (as an appetizer)
- Prep time: 15 minutes
- Cook time: 25–30 minutes
- Total time: 40–45 minutes
- Skill level: Easy
- Taste: savory + crunchy
This recipe is forgiving, so you can confidently make it for guests or a relaxed weeknight snack.
Ingredients You’ll Need
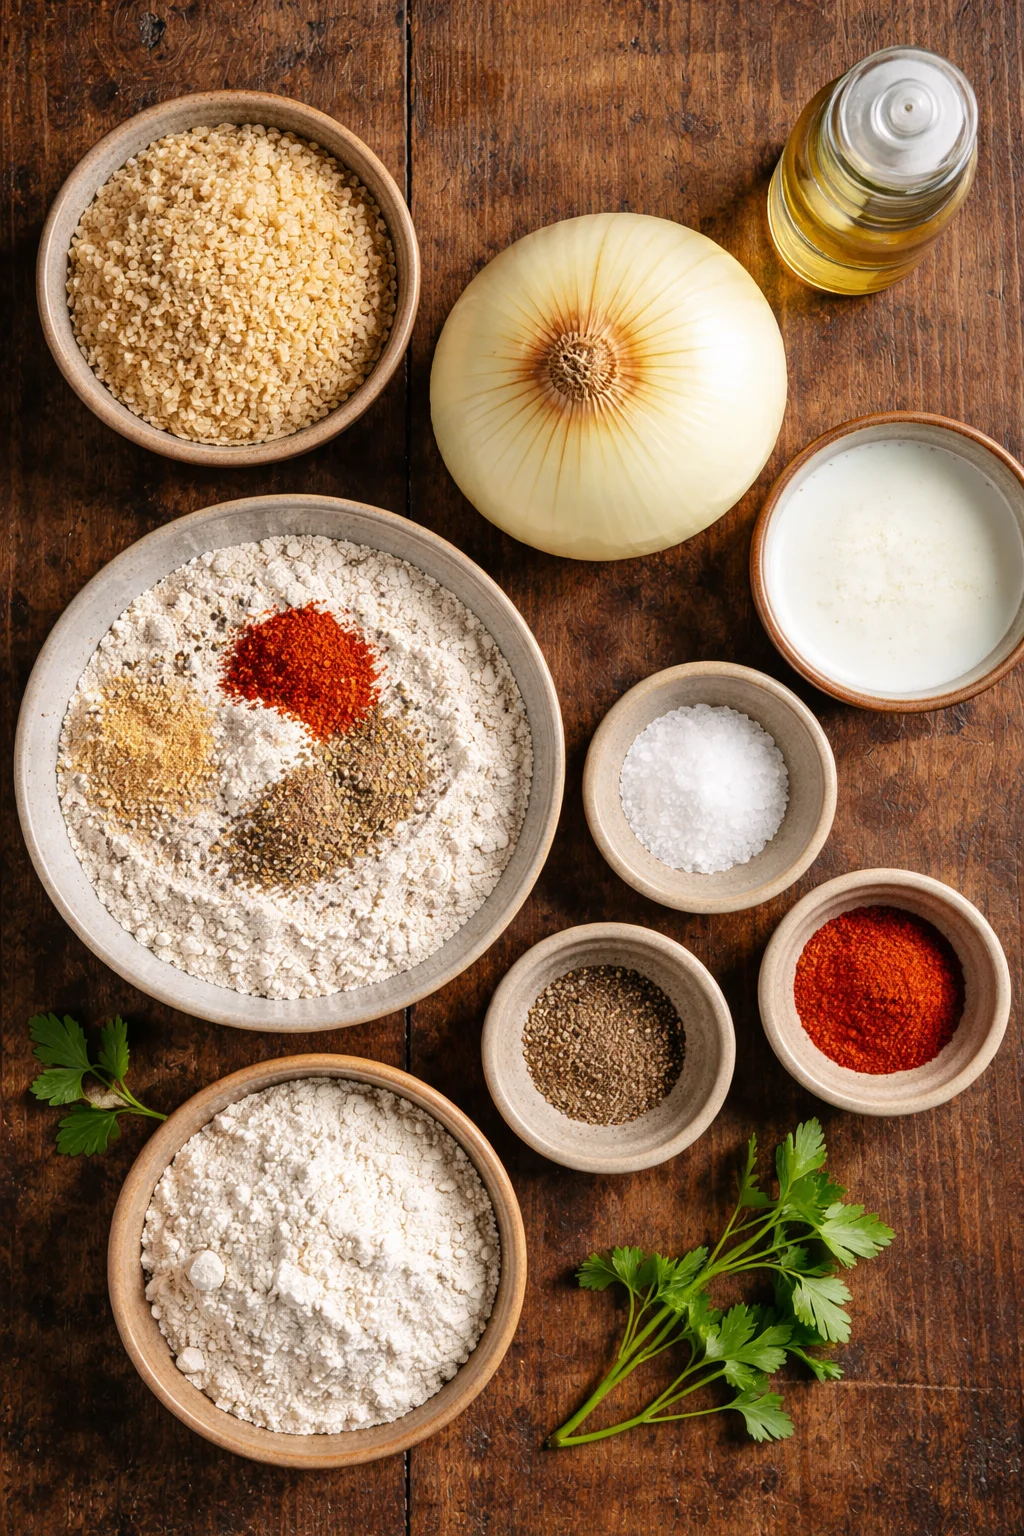
- 1 large onion
- 1 cup all-purpose flour
- 1 teaspoon paprika
- 1 teaspoon garlic powder
- 1 teaspoon onion powder
- 1 teaspoon salt
- 1/2 teaspoon black pepper
- 1/2 cup buttermilk
- 1 cup breadcrumbs
- Cooking spray
Chef notes:
- Use a firm onion for better petals.
- Buttermilk adds tang and helps the coating stick.
- Plain breadcrumbs keep it light.
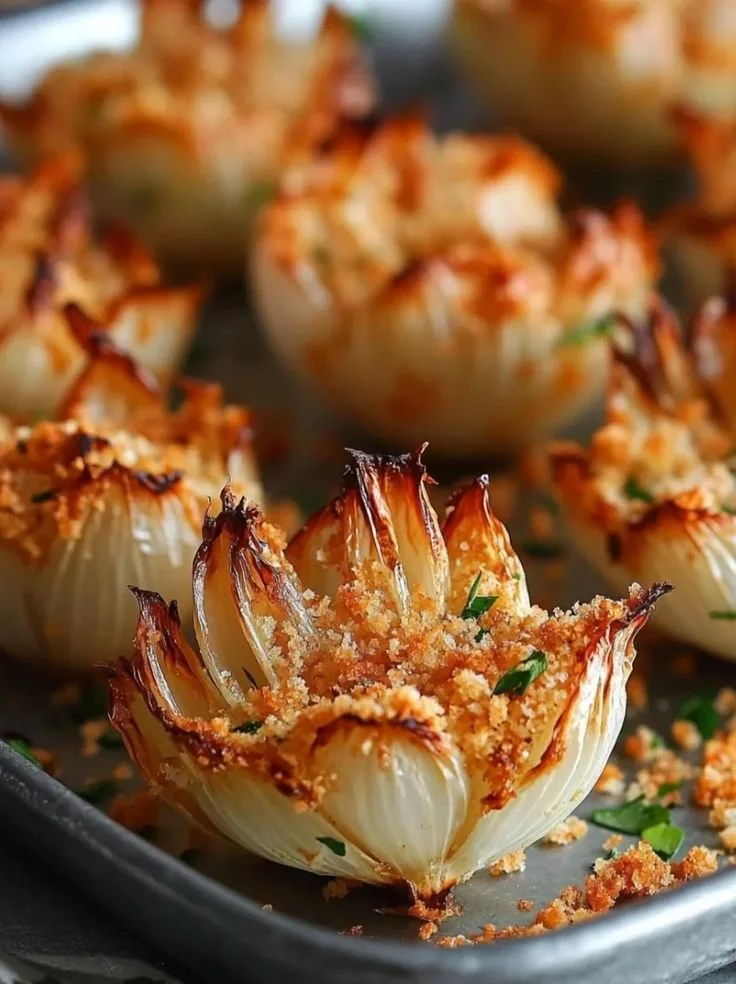
How to Make It
- First, heat your oven to 400°F (200°C). Line a baking sheet with foil and lightly oil it.
- Next, trim the top of the onion and peel the outer layer. Place onion root-side down. Make vertical cuts about 1/2 inch apart, slicing down toward the root but stop before you cut through. Gently open the petals.
- Then, whisk flour, paprika, garlic powder, onion powder, salt, and black pepper in a shallow bowl. Smell that paprika — it adds warmth.
- Dip the onion into buttermilk, letting it drip for a moment. Coat it well in the flour mix so each petal has a dusting.
- After the first coat, dunk the onion again in buttermilk, then press it into the breadcrumbs for a crunchy finish. Make sure crumbs reach between petals.
- Place the onion on the prepared sheet and spray the top and sides with cooking spray so it browns evenly. If you want a richer dinner, serve nearby the French onion chicken bake I often make.
- Finally, bake 25–30 minutes. Look for golden edges and a crisp sound when you tap a petal. Let it rest 5 minutes before serving with your favorite dipping sauce.
Kitchen Tips (From My Kitchen)
- Time-saver: Prep the flour and breadcrumbs in two shallow dishes so assembly moves quickly.
- Common mistake + fix: If petals stay closed, re-cut a little deeper near the root so heat can reach inside.
- Simple variation: Sprinkle smoked paprika or add grated Parmesan to breadcrumbs for extra flavor.
Serving Ideas
- Serve as an appetizer at a casual dinner party with spicy mayo or ranch.
- Add to a brunch spread alongside eggs and greens for contrast.
- For a crowd, place two on a large board with pickles and sliced sausage.
- Garnish with chopped parsley or chives and lemon wedges for brightness.
- Pair with parmesan baked pork chops for a hearty main-and-share combo.
Storing & Leftovers
- Fridge: Store in an airtight container for up to 2 days; crispness fades.
- Freezer: Not recommended — coating sogginess increases after thawing.
- Reheat: Warm in a 375°F oven for 8–10 minutes to revive the crunch.
Leftover idea: Chop petals and toss into a salad or wrap for a crunchy sandwich boost. Also, if you want other oven comfort foods, check the easy baked ziti I make often.
Baked Blooming Onion
Ingredients
Method
- Heat your oven to 400°F (200°C). Line a baking sheet with foil and lightly oil it.
- Trim the top of the onion and peel the outer layer. Place onion root-side down and make vertical cuts about 1/2 inch apart, slicing down towards the root but stopping before cutting through. Gently open the petals.
- Whisk together flour, paprika, garlic powder, onion powder, salt, and black pepper in a shallow bowl.
- Dip the onion into buttermilk, letting it drip for a moment. Coat well in the flour mix, ensuring each petal has a dusting.
- Dunk the onion again in buttermilk, then press it into the breadcrumbs for a crunchy finish, ensuring crumbs reach between petals.
- Place the onion on the prepared sheet and spray the top and sides with cooking spray.
- Bake for 25-30 minutes until you see golden edges and hear a crisp sound when tapping a petal.
- Let it rest for 5 minutes before serving with your favorite dipping sauce.
Notes
FAQs
Q: Can I make this ahead?
A: You can pre-coat and refrigerate the onion for a few hours, then bake when ready. Coat last to keep crumbs crisper.
Q: What substitutions work for buttermilk?
A: Thin plain yogurt with a splash of milk or mix 1/2 cup milk with 1/2 tablespoon lemon juice; they both work in a pinch.
Q: How do I know it’s done?
A: The petals will be golden-brown and feel crisp to the touch; the center will be tender when a knife slips in easily. Baked Blooming Onion develops a golden crust when ready.
Q: Can I freeze a prepared onion?
A: Freezing isn’t ideal; the texture softens and coating gets soggy after thawing.
Final Thoughts
I love how a simple onion becomes something playful and shareable with just a few pantry staples. Try this recipe exactly once, then tweak spices to make it yours — it’s how recipes become family favorites. Enjoy the warm, pull-apart magic of a Baked Blooming Onion.
Conclusion
If you want more ideas or alternate methods, I often look at Baked Blooming Onion | Gimme Some Oven for inspiration, and for a lighter spin see Easy Healthy Baked Blooming Onion Recipe – Wicked Spatula.


Leave a comment