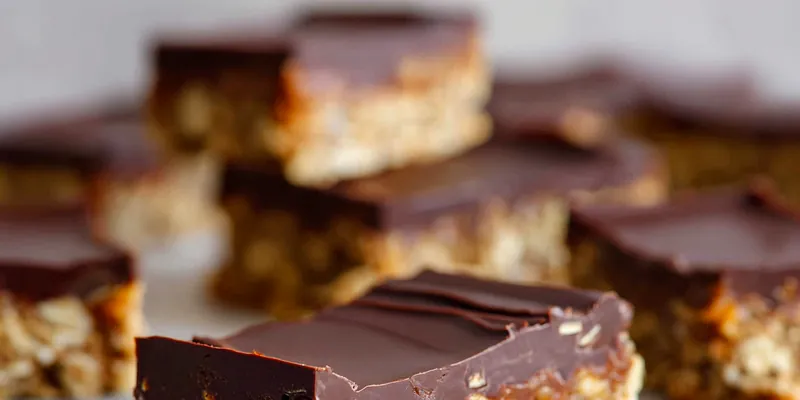
No Bake Chocolate Oat Bars
These No Bake Chocolate Oat Bars are a delightful treat packed with flavor and nutrition. Perfect for busy days, they make a quick snack or dessert option. Easy to prepare and requires no baking, making them a hit for all ages!

Why This No Bake Chocolate Oat Bars Recipe Works
This recipe combines wholesome oats and rich chocolate for a satisfying snack. The no-bake technique makes it quick and accessible for anyone, regardless of baking skills. The use of almond butter and honey keeps it naturally sweet and nutritious.
Each bite balances the chewy oats with creamy chocolate, making it an instant favorite. Additionally, the bars are customizable – you can add nuts, seeds, or dried fruit to tailor them to your taste. Perfect for on-the-go snacking!
💡 Professional Tip
For best results, press the mixture tightly into the pan to ensure the bars hold together well. You can also experiment with different nut butters for varied flavors.
Frequently Asked Questions
Absolutely! These bars can be made up to a week in advance and stored in the refrigerator. Just be sure to cut them after they have set for optimal freshness.
You can use peanut butter or sunflower seed butter as a substitute. Each option will give a unique flavor change while maintaining the texture of the bars.
Since this is a no-bake recipe, you’ll know it's done once it’s chilled and firm to the touch. You can also check the edges of the bars; they should pull away slightly from the sides of the pan.
Yes, these bars freeze very well! Wrap them individually in plastic wrap and store them in an airtight container for up to 3 months.
You will need a mixing bowl, a baking dish (8x8 inches), and a spatula for mixing and spreading. Parchment paper is also beneficial for easy removal.
These bars are delicious on their own, but you can serve them with a glass of milk or a cup of coffee for a quick snack. They also pair nicely with fresh fruit.
This recipe is not spicy, but you can add a sprinkle of cinnamon or cayenne pepper if you're looking for a flavor boost. Start with a small amount and adjust according to your preference.
Store leftover bars in an airtight container in the refrigerator for up to a week. If frozen, they can last for three months, making them a great make-ahead snack.
Recipe Troubleshooting Guide
Too Dry
Problem: If the bars are too dry, it may be due to a lack of moisture in the mixture.
Solution: Add a little more almond butter or honey to bring the mixture together. You can also try adding a splash of milk to reach the desired consistency.
Uneven Texture
Problem: Uneven texture may occur if ingredients are not mixed well.
Solution: Make sure to thoroughly combine the wet and dry ingredients until no dry oats remain. Press the mixture down firmly in the pan to even out the texture.
Lacking Flavor
Problem: If the bars taste bland, it could be due to insufficient seasoning.
Prevention: Add a pinch of salt or a bit more vanilla extract to enhance the flavor. Adjusting sweetness with more honey or sugar can also help.
Wrong Texture
Problem: If the texture is too crumbly, it may not have enough binding agents.
Recovery: Ensure you are using enough almond butter or honey for binding. Press the mixture firmly into the pan to help it hold together.
Overcooked
Problem: Overcooked bars can occur if they have been left to set for too long.
Prevention: Keep an eye on the chilling time and remove them as soon as they are firm. Check frequently after the first hour.
Flavor Balance
Too Sweet: If your bars are too sweet, reduce the amount of honey in the next batch.
Too Salty: To fix overly salty bars, consider adding more oats to dilute the saltiness.
Bland: If bland, try adding extra cocoa powder or a dash of cinnamon for a flavor boost.
Choosing the Best Ingredients
When selecting oats, choose rolled oats for the best texture and chewiness. Ensure that your cocoa powder is unsweetened to control the sweetness of the bars. Use high-quality almond butter for a rich flavor and smooth consistency.
Always opt for natural sweeteners like honey or maple syrup for healthier sweetness. Check for fresh chocolate chips to ensure they melt well and enhance the taste. These simple choices elevate your No Bake Chocolate Oat Bars significantly.
Essential Ingredient Notes
- Rolled Oats: Choose certified gluten-free rolled oats if needed. They provide the perfect base and texture for these bars.
- Almond Butter: Select a creamy almond butter without added sugars or oils. This ensures a smooth mixture and better flavor.
- Cocoa Powder: Use high-quality unsweetened cocoa powder for the richest chocolate flavor. Avoid sweetened varieties as they can alter the balance.
Cooking Technique Tips
Mixing the ingredients thoroughly is crucial for even flavor and texture. Use a sturdy spatula or your hands to ensure everything is well combined. Press firmly into the pan to eliminate air pockets and create a dense bar.
After combining, refrigerate adequately to achieve the correct firmness. You can also freeze them for a faster setting time. Cutting the bars while slightly chilled makes for cleaner edges.
Chef's Secret Technique
For added depth, consider toasting the rolled oats lightly before mixing. This enhances their nuttiness and flavor profile. Also, try adding a pinch of espresso powder to intensify the chocolate taste.
No Bake Chocolate Oat Bars
📋 Ingredients
For the Base:
- 2 cups rolled oats💡 Choose gluten-free if necessary.
- 1 cup almond butter💡 Opt for creamy and natural.
- 1/2 cup honey💡 Maple syrup can be used.
- 1/2 cup unsweetened cocoa powder💡 This gives rich chocolate flavor.
For the Flavor:
- 1/4 cup chocolate chips💡 Use dark or semi-sweet.
- 1/2 teaspoon vanilla extract💡 Enhances the overall flavor.
- 1/4 teaspoon salt💡 Balances sweetness.
Instructions
Step 1: Prepare Ingredients
In a large mixing bowl, combine rolled oats and cocoa powder. This will create the base for your bars.
Step 2: Mix Wet Ingredients
In a separate bowl, mix almond butter, honey, vanilla extract, and salt until smooth. This adds sweetness and binds the ingredients.
Step 3: Combine Mixtures
Pour the wet mixture into the dry oat mixture. Stir until thoroughly combined.
Step 4: Add Chocolate Chips
Fold in chocolate chips for added flavor. This will enhance the chocolate taste.
Step 5: Prepare Baking Dish
Line an 8x8 inch baking dish with parchment paper. This prevents the bars from sticking.
Step 6: Spread and Press
Spread the mixture evenly in the prepared dish and press down firmly. This helps the bars hold together.
Step 7: Refrigerate
Refrigerate for at least 1 hour to set. This ensures they firm up for easy cutting.
Step 8: Cut and Serve
Once set, cut into squares and enjoy! These bars are perfect for snacking anytime.
Recipe Notes & Tips
Storage
Store these bars in an airtight container in the refrigerator for up to a week. For longer storage, freeze them individually wrapped.
Serving Suggestions
Enjoy these bars with a glass of milk or as a quick breakfast option. Pair them with fresh fruit for a balanced snack.
Variations
Add nuts, seeds, or dried fruits to customize these bars. You can also experiment with different nut butters for unique flavors.