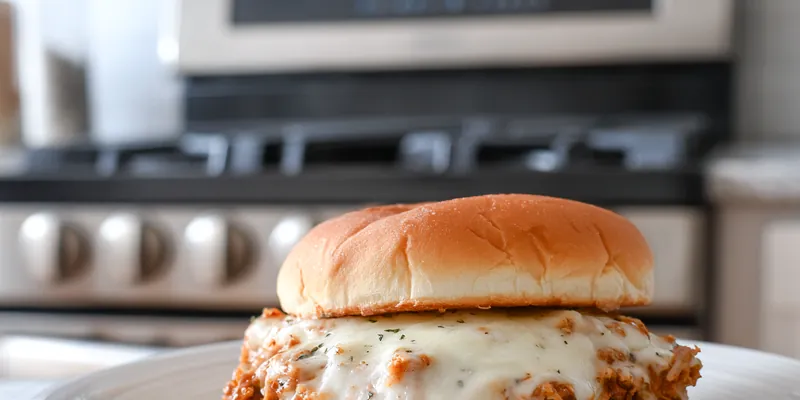
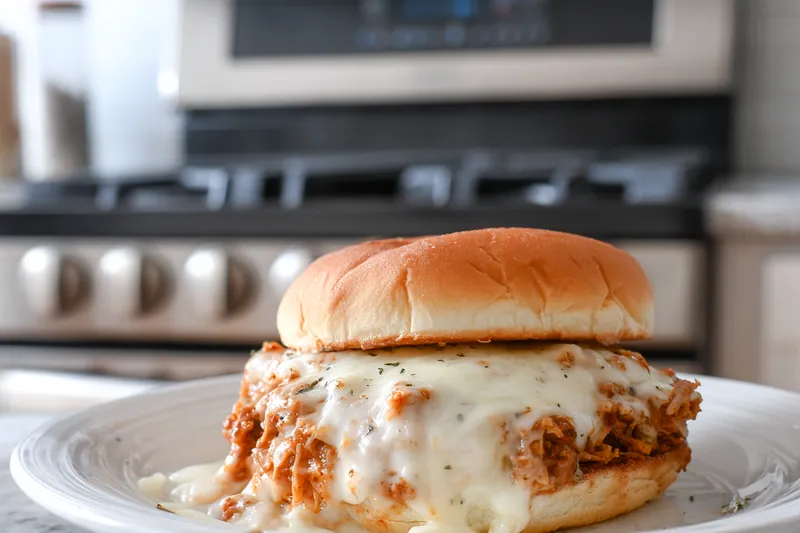
Crispy Chicken Parmesan Sliders
These Crispy Chicken Parmesan Sliders deliver all the comfort of classic chicken parm in a perfectly portioned, handheld format. Golden breaded chicken cutlets are topped with tangy marinara and gooey melted mozzarella, then nestled into buttery toasted slider buns. Whether you're feeding hungry teenagers after practice or hosting game day, these sliders disappear fast and leave everyone asking for seconds.

Why These Chicken Parmesan Sliders Work
The secret to exceptional chicken parmesan sliders lies in achieving that perfect balance of textures. The chicken needs to be thin enough to cook quickly and fit properly on slider buns, but thick enough to stay juicy inside while developing a shatteringly crisp coating. By pounding the chicken to a consistent half-inch thickness, you ensure even cooking and the ideal meat-to-breading ratio that makes each bite satisfying without being heavy.
The slider format offers distinct advantages over traditional chicken parmesan. Individual portions mean everyone gets their perfect ratio of chicken to cheese to sauce, and the smaller size makes them ideal for parties where guests want to try multiple items. The buttered, toasted buns add a subtle richness and structural integrity that prevents sogginess, keeping these sliders crunchy and delicious even fifteen minutes after assembly.
💡 Professional Tip
Pound your chicken breasts between plastic wrap with a meat mallet, working from the center outward in gentle, even strokes. This prevents tearing and creates uniform thickness for consistent cooking.
Frequently Asked Questions
You can bread the chicken up to 4 hours ahead and refrigerate on a wire rack until ready to fry. For best results, fry the chicken just before serving to maintain maximum crispiness. If you must prepare fully ahead, fry the chicken, let it cool completely, and refrigerate. Reheat on a wire rack in a 375°F oven for 8-10 minutes before adding sauce and cheese.
Absolutely! Chicken tenders are actually ideal for sliders because they're already the right size. You'll need about 16 tenders for 8 sliders (2 per slider). Just adjust the cooking time slightly as tenders may cook faster than breast pieces, usually 3-4 minutes per side.
Yes, for a lighter version, place breaded chicken on a greased wire rack over a baking sheet. Spray lightly with cooking oil and bake at 425°F for 15-18 minutes, flipping halfway through, until golden and cooked through. The texture won't be quite as crispy as fried, but it's still delicious and significantly reduces the oil content.
Italian-seasoned breadcrumbs provide the most flavor and authentic texture. Panko breadcrumbs create an extra-crispy coating if you prefer more crunch. Regular plain breadcrumbs work in a pinch but add an extra 1/2 teaspoon each of dried basil and oregano to compensate for missing seasoning.
Use an instant-read thermometer inserted into the thickest part of the chicken. It should register 165°F for safe consumption. Visual cues include golden-brown coating on both sides, chicken feels firm when pressed gently, and juices run clear when pierced with a knife. The coating should be crispy and not soggy.
These pair beautifully with a simple Italian chopped salad, crispy garlic parmesan fries, or classic coleslaw for crunch. For parties, serve alongside mozzarella sticks, marinara for dipping, and a pasta salad. A light arugula salad with lemon vinaigrette cuts through the richness perfectly for a more balanced dinner.
While mozzarella is traditional and provides that perfect melt, you can experiment with other Italian cheeses. Try a blend of mozzarella and provolone for deeper flavor, or add a sprinkle of sharp Parmesan on top for extra tang. Fontina melts beautifully and adds a nutty richness. Avoid pre-shredded cheese when possible as freshly shredded melts more smoothly.
Store components separately for best results. Keep fried chicken in an airtight container in the refrigerator for up to 3 days. Store sauce and cheese separately. To reheat, place chicken on a wire rack in a 375°F oven for 8-10 minutes until crispy, then add fresh sauce and cheese and broil. Avoid microwaving as it makes the breading soggy.
Recipe Troubleshooting Guide
Breading Falls Off During Frying
Problem: The coating separates from the chicken and floats away in the oil, leaving bare patches.
Solution: Ensure chicken is completely dry before breading. Press breadcrumbs firmly onto chicken and let breaded pieces rest on a wire rack for 10 minutes before frying. Don't move chicken for the first 2 minutes of frying to allow coating to set. Make sure oil is at proper temperature (350°F) before adding chicken.
Chicken Is Dry Inside
Problem: The chicken breast comes out tough and lacking moisture despite golden exterior.
Solution: Don't overcook the chicken. Use a meat thermometer and remove from heat at exactly 165°F. Pound chicken to even thickness so it cooks uniformly. Consider brining chicken in salted water for 30 minutes before breading for extra juiciness. Let chicken rest 3 minutes after frying before assembling sliders.
Coating Is Soggy Not Crispy
Problem: The breading turns out soft and greasy rather than crunchy.
Prevention: Oil temperature is crucial. If too low, chicken absorbs excess oil. Maintain 350°F throughout frying. Don't overcrowd the pan as this drops oil temperature. Drain fried chicken on a wire rack, never paper towels flat, so air circulates and steam escapes. Add sauce and cheese just before serving, not too early.
Sliders Are Messy to Eat
Problem: Cheese and sauce slide out the sides making sliders difficult to handle.
Recovery: Use sauce sparingly, about 2-3 tablespoons per slider, concentrated in the center. Let cheese cool for 1-2 minutes after broiling so it sets slightly. Toast buns well so they provide structure. Cut chicken pieces slightly smaller than bun diameter so toppings stay contained. Serve with plenty of napkins.
Chicken Cooks Unevenly
Problem: Some parts are overcooked while others remain undercooked.
Prevention: Pound chicken to uniform 1/2-inch thickness before breading. Cut pieces to similar sizes. Fry in batches of similar-sized pieces. Use a heavy-bottomed skillet that distributes heat evenly. Flip chicken only once during cooking. If pieces are browning too fast but not cooked through, transfer to a 350°F oven to finish cooking.
Flavor Balance Issues
Too Sweet: If marinara tastes too sweet, add a pinch of red pepper flakes and a splash of red wine vinegar to brighten the flavor.
Too Salty: If breading is too salty, reduce salt in breadcrumb mixture and let cheese provide most of the salt. Rinse chicken before patting dry.
Bland: If sliders taste bland, add more Italian seasoning and garlic powder to breadcrumbs. Use high-quality marinara with good herb flavor. Add fresh basil and a drizzle of garlic butter on buns.

Ingredient Selection Guide
The quality of your chicken makes a significant difference in the final result. Choose fresh, never-frozen chicken breasts with a pink color and no strong odor. Organic or air-chilled chicken tends to have better texture and flavor. If using frozen chicken, thaw completely in the refrigerator for 24 hours and pat thoroughly dry before pounding. Excess moisture is the enemy of crispy breading, so this step cannot be rushed.
Your choice of marinara sauce impacts the overall flavor profile significantly. Look for marinara with simple ingredients like tomatoes, olive oil, garlic, and herbs. Avoid sauces with high sugar content or excessive additives. For the best flavor, use a sauce you'd enjoy eating on pasta. Fresh mozzarella provides superior melt and flavor compared to pre-shredded varieties, which contain anti-caking agents that affect texture. Buy a block and shred it yourself for optimal results.
Essential Ingredient Notes
- Chicken Breast: Select breasts that are similar in size for even cooking. Look for plump, firm pieces without excess liquid in the package. Pound to exactly 1/2-inch thickness using a meat mallet for uniform cooking and ideal texture.
- Italian Breadcrumbs: Store-bought Italian-seasoned breadcrumbs save time and provide consistent flavor. Check the expiration date as stale breadcrumbs won't crisp properly. Store in an airtight container to maintain freshness and prevent clumping.
- Mozzarella Cheese: Low-moisture mozzarella melts without releasing excess water that makes sliders soggy. Whole milk mozzarella provides richer flavor than part-skim. Shred just before using for best melt and avoid pre-shredded for optimal texture.
Mastering the Cooking Technique
Achieving restaurant-quality crispy chicken at home requires attention to oil temperature and timing. Use a heavy-bottomed skillet or cast iron pan that maintains consistent heat. A cooking thermometer is invaluable for monitoring oil temperature at 350°F. If the oil is too cool, chicken absorbs excess oil and becomes greasy. Too hot, and the coating burns before the chicken cooks through. Add chicken pieces carefully without splashing, and give them space so they're not touching, which allows even browning.
The broiling step that melts the cheese is brief but critical. Position your oven rack about 6 inches from the broiler element. Watch constantly as broilers vary in intensity and cheese can go from perfectly melted to burnt in seconds. The moment you see bubbling and light golden spots on the cheese, remove the pan. Let sliders rest for just one minute before assembling so cheese sets slightly and won't slide off when eaten.
The Three-Step Breading Process
The classic flour-egg-breadcrumb sequence creates layers that lock onto the chicken. Flour dries the surface and provides a base for egg to adhere. Egg acts as glue for breadcrumbs. Press breadcrumbs firmly with your palms and shake off loose bits. Use one hand for dry ingredients and one for wet to prevent clumping on your fingers.
Crispy Chicken Parmesan Sliders
📋 Ingredients
For the Chicken
- 1.5 cups marinara sauceChoose a quality marinara with good herb flavor and low sugar content
- 2 cups shredded mozzarella cheeseLow-moisture whole milk mozzarella, freshly shredded for best melt
- Fresh basil leaves for garnishAdds bright, fresh flavor that cuts through richness
- 8 slider buns, toastedChoose soft potato buns or brioche for best texture
- 2 tablespoons butter, meltedFor brushing buns to add richness and prevent sogginess
For Assembly
- 1.5 lbs chicken breast, pounded to 1/2 inch thicknessChoose fresh, never-frozen breasts of similar size for even cooking
- 1 cup all-purpose flourFirst coating that helps breading adhere to chicken
- 2 large eggs, beatenActs as glue to bind breadcrumbs to chicken
- 1.5 cups Italian-seasoned breadcrumbsProvides crispy coating and authentic Italian flavor
- 1/2 cup grated Parmesan cheeseAdds nutty, salty depth to breading mixture
- 1 teaspoon garlic powderProvides savory backbone to the breading
- 1 teaspoon dried Italian seasoningBlend of herbs that enhances authentic Italian flavor
- 1/2 teaspoon saltSeasons chicken and enhances all flavors
- 1/4 teaspoon black pepperAdds subtle heat and depth
- 1/3 cup vegetable oil for fryingNeutral oil with high smoke point for perfect frying
Instructions
Prepare Chicken and Breading Station
Cut chicken breasts into 8 equal portions that fit slider buns, roughly 3-4 inches wide. Pound each piece to 1/2-inch thickness using a meat mallet. Set up three shallow bowls in assembly line fashion: one with flour, one with beaten eggs, and one with breadcrumbs mixed with Parmesan cheese, garlic powder, Italian seasoning, salt, and black pepper. Stir the breadcrumb mixture well to distribute seasonings evenly.
Bread the Chicken
Pat each chicken piece thoroughly dry with paper towels to remove all surface moisture. Working with one piece at a time, coat completely in flour and shake off excess. Dip into beaten egg, letting excess drip back into bowl. Finally, press firmly into breadcrumb mixture on both sides, using your palms to ensure complete, even coverage. Place breaded pieces on a wire rack and let rest for 10 minutes to help coating adhere.
Fry the Chicken
Heat vegetable oil in a large heavy-bottomed skillet over medium-high heat until it reaches 350°F on a cooking thermometer. Carefully add chicken pieces in batches of 3-4, being careful not to overcrowd the pan. Fry for 4-5 minutes on the first side without moving them, then flip carefully and fry another 4-5 minutes until golden brown and internal temperature reaches 165°F. Transfer to a paper towel-lined plate. Maintain oil temperature between batches.
Add Toppings and Melt Cheese
Preheat broiler to high and position rack 6 inches from heat source. Arrange all fried chicken pieces on a large baking sheet. Spoon 2-3 tablespoons of marinara sauce onto the center of each piece, spreading slightly but not to the edges. Top each with 1/4 cup of shredded mozzarella cheese. Broil for 2-3 minutes, watching carefully, until cheese is melted, bubbly, and just beginning to brown in spots. Remove immediately and let rest 1 minute.
Assemble Sliders
While cheese is melting, slice slider buns in half and toast cut sides under broiler for 1 minute until lightly golden. Brush bottom buns with melted butter. Place one piece of cheesy chicken on each buttered bottom bun. Garnish with 1-2 fresh basil leaves torn by hand. Top with remaining bun halves. Serve immediately while chicken is hot and crispy, with extra marinara sauce on the side for dipping.
Recipe Notes & Tips
Storage
Store fried chicken, sauce, and cheese separately in airtight containers in refrigerator for up to 3 days. Reheat chicken on a wire rack in 375°F oven for 8-10 minutes until crispy and heated through, then add fresh sauce and cheese and broil briefly. Assembled sliders don't store well as buns become soggy.
Serving Suggestions
Serve these sliders with garlic parmesan fries, a crisp Caesar salad, or classic Italian chopped salad. For parties, arrange on a platter with toothpicks and extra marinara for dipping. They pair wonderfully with Italian sodas, lemonade, or light Italian red wines like Chianti.
Variations
Try spicy chicken parm sliders by adding 1/2 teaspoon cayenne to breadcrumbs and using arrabbiata sauce. Make Buffalo chicken parm by tossing fried chicken in buffalo sauce before adding mozzarella. For a lighter version, use panko breadcrumbs and bake at 425°F instead of frying. Substitute ciabatta rolls for a more rustic presentation.