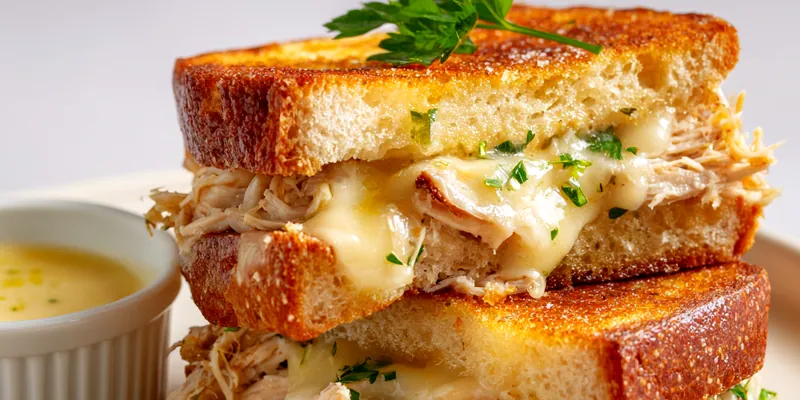
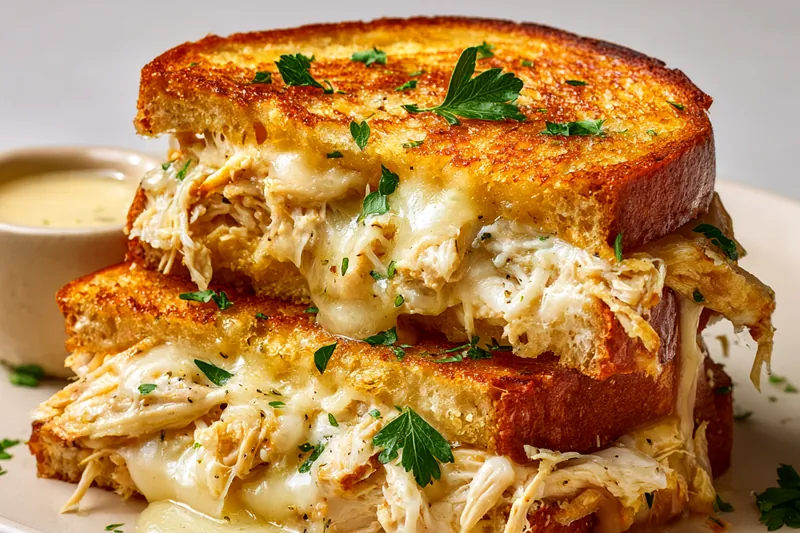
Crispy Chicken Garlic Sandwich with Melted Cheese
This Chicken Garlic Sandwich is the ultimate comfort food that comes together in under 30 minutes. Tender shredded chicken coated in aromatic garlic butter, sandwiched between crispy golden bread with melted cheese - it's absolutely irresistible. Perfect for busy weeknights, easy lunches, or whenever you need a satisfying meal that the whole family will love.

Why This Chicken Garlic Sandwich Works
The magic of this sandwich lies in the triple layer of garlic flavor. First, we infuse the butter with fresh minced garlic, creating an aromatic base that penetrates every bite. Then, we toss the shredded chicken in this garlic butter, allowing the meat to absorb all those wonderful flavors. Finally, we brush the outside of the bread with the remaining garlic butter before toasting, which creates a crispy, golden crust with an incredible savory aroma. This technique ensures you get garlic flavor in every single bite without it being overwhelming.
Using two types of cheese - mozzarella and provolone - creates the perfect melty texture and complex flavor profile. Mozzarella provides that classic stretch and mild creaminess, while provolone adds a slightly sharper, more sophisticated taste that complements the garlic beautifully. When heated in the sandwich, these cheeses melt together into a gooey, delicious layer that binds the chicken and bread together. The combination also prevents the sandwich from being too heavy while still delivering that indulgent, cheesy satisfaction we all crave in a great sandwich.
💡 Professional Tip
Always let your garlic cook gently in the butter without browning - burnt garlic turns bitter and will ruin the delicate flavor balance of your sandwich. Keep the heat at medium and stir constantly for those first two minutes.
Frequently Asked Questions
You can prepare the garlic butter chicken mixture up to 2 days ahead and store it covered in the refrigerator. However, for best results, assemble and toast the sandwiches fresh right before serving. The bread can get soggy if assembled too far in advance. If you need to prep ahead, keep the components separate and assemble just before cooking.
Thick-cut sourdough or Italian bread works best because it holds up to the moisture from the chicken and doesn't get soggy. The bread should be sturdy enough to support the filling but not so dense that it overwhelms the other flavors. Avoid thin sandwich bread as it will become mushy. Ciabatta and French bread are also excellent choices.
Absolutely! Rotisserie chicken is perfect for this recipe and saves time. Simply remove the skin, shred the meat, and proceed with the recipe. The pre-cooked chicken actually works wonderfully because it's already seasoned and tender. You'll need about one whole rotisserie chicken to get 2 cups of shredded meat.
If you can't find provolone, you can use all mozzarella, though the flavor will be milder. Swiss cheese, fontina, or Monterey Jack are also good melting cheeses that work well. For a sharper flavor, try adding a bit of white cheddar. Just make sure whatever cheese you choose melts well - avoid pre-shredded cheese with anti-caking agents as it doesn't melt as smoothly.
The sandwich is ready when both sides are golden brown and crispy, and you can see the cheese melting and starting to ooze slightly from the edges. If you press down gently with your spatula, the sandwich should feel firm but give slightly, indicating the cheese inside is fully melted. The internal temperature should reach 165°F if you want to check with a thermometer.
This rich sandwich pairs beautifully with lighter sides. A simple green salad with vinaigrette, crispy pickle spears, kettle chips, or a cup of tomato soup are all excellent choices. For a more substantial meal, serve with sweet potato fries or a Mediterranean chickpea salad. The acidity from pickles or salad helps cut through the richness of the garlic butter and cheese.
Yes! Sautéed spinach, caramelized onions, or roasted red peppers are delicious additions that complement the garlic chicken beautifully. Just make sure any vegetables you add are cooked and excess moisture is removed so they don't make the sandwich soggy. Add them as a thin layer over the cheese for best results.
Store leftover assembled but uncooked sandwiches wrapped tightly in plastic wrap in the refrigerator for up to 24 hours, then toast when ready to eat. Already-cooked sandwiches can be refrigerated for 2-3 days and reheated in a skillet over medium heat or in a 350°F oven for 10 minutes. The texture won't be quite as crispy as fresh, but it will still be delicious.
Recipe Troubleshooting Guide
Soggy Bread
Problem: The bread becomes soggy instead of crispy during cooking.
Solution: Make sure your chicken mixture isn't too wet - drain any excess liquid before assembling. Use thicker bread that can handle moisture, and don't overload the sandwich with filling. Toast on medium heat rather than low to ensure the outside crisps before moisture seeps through. You can also lightly toast the inside of the bread before assembling.
Burnt Garlic
Problem: The garlic tastes bitter and burned.
Solution: Garlic burns quickly and turns bitter. Always cook it over medium heat (not high) and only for 1-2 minutes until fragrant. Remove from heat immediately once you smell the aroma. If using a hot pan, take it off the burner while adding garlic to prevent scorching. Fresh garlic also burns faster than jarred minced garlic.
Cheese Not Melting
Problem: The cheese stays solid and doesn't get gooey.
Prevention: Cover the skillet with a lid while cooking to trap heat and help the cheese melt from the top. Cook over medium heat (not high) to give the cheese time to melt before the bread burns. You can also microwave the assembled sandwich for 20-30 seconds before toasting to jumpstart the melting process. Freshly shredded cheese melts better than pre-packaged shredded cheese.
Uneven Browning
Problem: One side is golden while the other is pale or burnt.
Recovery: Make sure your skillet is properly preheated and maintains consistent temperature. Use a heavy-bottomed pan for even heat distribution. Press down gently with a spatula to ensure good contact with the cooking surface. If your stove has hot spots, rotate the sandwich 180 degrees halfway through cooking each side.
Dry Chicken
Problem: The chicken filling tastes dry despite adding garlic butter.
Prevention: Toss the chicken in the garlic butter while it's still warm so it absorbs more moisture. Use chicken thighs instead of breast meat as they're naturally more moist. If using leftover chicken, add an extra tablespoon of garlic butter to the mixture. You can also add a tablespoon of mayonnaise or cream cheese to the chicken mixture for extra moisture and richness.
Flavor Balance Issues
Too Sweet: If somehow too sweet (unlikely with this recipe), add a pinch more salt and a squeeze of lemon juice to the chicken mixture to balance flavors.
Too Salty: If too salty, add more unsalted chicken or a tablespoon of cream cheese to the mixture to dilute the salt. You can also serve with a side of fresh tomato slices or lettuce to balance the saltiness.
Bland: If bland, you likely didn't use enough garlic or salt. Add more minced garlic to the butter, increase the Italian seasoning, and season the chicken mixture generously with salt and pepper. Don't forget the red pepper flakes for a subtle kick.
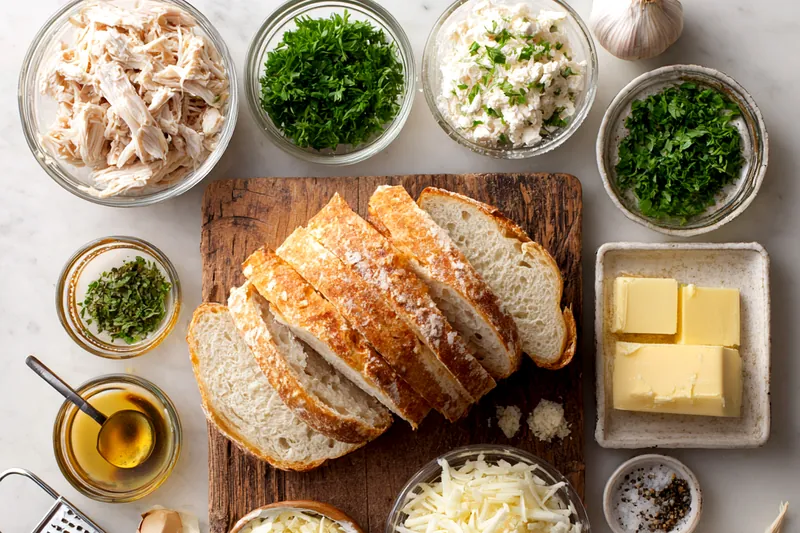
Choosing the Best Ingredients
The quality of your bread makes or breaks this sandwich. Look for a sturdy, artisan-style loaf with a tight crumb that won't fall apart when loaded with filling. Sourdough is my top choice because its slight tanginess complements the rich garlic butter, and it has the perfect texture - crispy on the outside when toasted, yet soft and chewy inside. The bread should be sliced about 3/4 inch thick - any thinner and it gets soggy, any thicker and it overwhelms the filling. Day-old bread actually works better than fresh because it's slightly drier and will crisp up beautifully without burning.
When it comes to garlic, fresh is absolutely essential - don't even think about using garlic powder for this recipe. Fresh garlic cloves have a complex, pungent flavor with natural sweetness that develops when gently cooked in butter. Look for firm bulbs with tight, papery skin and no green sprouts. The fresher the garlic, the more aromatic your sandwich will be. For the cheese, buy blocks of mozzarella and provolone and shred them yourself rather than using pre-shredded varieties. Pre-shredded cheese contains anti-caking agents that prevent smooth melting, while freshly grated cheese melts into that perfect gooey, stretchy consistency we're after.
Essential Ingredient Notes
- Garlic: Use 5 large fresh garlic cloves, minced finely. Fresh garlic is crucial - the jarred stuff won't give you the same depth of flavor. To mince quickly, smash cloves with the flat side of your knife first, then chop. The oils released by fresh garlic create that irresistible aroma.
- Chicken: Rotisserie chicken is a huge time-saver and adds extra flavor since it's already seasoned. If cooking your own, poach chicken breasts in seasoned water or broth to keep them moist. Shred while slightly warm for easier handling and better butter absorption.
- Butter: Use real unsalted butter, not margarine or spreads. Unsalted butter lets you control the salt level and has a better flavor when combined with garlic. The butter should be melted but not clarified - you want all those milk solids that will help the bread brown beautifully.
Mastering the Perfect Toast
The difference between a good sandwich and a great one comes down to proper toasting technique. Medium heat is your sweet spot - too high and the bread burns before the cheese melts, too low and you get a greasy, limp sandwich. Preheat your skillet for a full 2-3 minutes before adding the first sandwich so the heat is evenly distributed. A heavy cast-iron skillet or griddle works best because it maintains consistent temperature and creates superior browning. As the sandwich cooks, press down gently but firmly with a spatula every 30 seconds or so. This ensures good contact between bread and pan, promotes even browning, and helps the cheese melt by trapping heat inside.
Covering the skillet with a lid for the first 2 minutes of cooking on each side creates a mini-oven effect that melts the cheese from above while the bread crisps below. Remove the lid for the last minute to ensure the bread gets perfectly crispy without steaming. Watch carefully during this final minute - once the bread reaches that perfect golden-brown color, it can burn quickly. The sandwich should sound slightly crispy when you tap it with your spatula, and you'll see cheese just starting to ooze from the edges. Resist the urge to cut into it immediately - letting it rest for 60 seconds allows the cheese to set slightly so it doesn't all run out when you slice it.
The Garlic Butter Method
Creating the perfect garlic butter is the foundation of this recipe. Melt your butter over medium heat until just liquefied, then immediately reduce heat to medium-low before adding garlic. Cook the garlic gently for 90 seconds to 2 minutes, stirring constantly, until it's fragrant and slightly softened but hasn't taken on any color. The moment you see even the slightest browning, remove from heat - you want the garlic's pungent sweetness, not its bitter burnt notes. Stir in your herbs and seasonings off the heat so they release their aromatics without burning. This technique creates a golden, fragrant garlic butter that coats every element of your sandwich with incredible flavor.
Crispy Chicken Garlic Sandwich with Melted Cheese
📋 Ingredients
Garlic Butter & Seasonings
- 6 tablespoons unsalted butter, dividedUse real butter, not margarine - it makes all the difference in flavor and browning
- 5 cloves garlic, mincedFresh garlic only - about 1½ tablespoons when minced. Look for firm bulbs without green sprouts
- 3 tablespoons fresh parsley, choppedFresh parsley adds color and bright flavor. Italian flat-leaf parsley works best
- 1 teaspoon Italian seasoningA blend of oregano, basil, and thyme complements the garlic perfectly
- ½ teaspoon saltFine sea salt or kosher salt - adjust to taste based on your bread's saltiness
- ¼ teaspoon black pepperFreshly ground for best flavor
- ¼ teaspoon red pepper flakes (optional)Adds a subtle kick without making it spicy - can be omitted
Sandwich Assembly
- 8 slices thick-cut breadSourdough or Italian bread, sliced ¾-inch thick for the perfect sturdy base
- 2 cups cooked chicken breast, shreddedRotisserie chicken works great! Remove skin and shred into bite-sized pieces
- 1 cup mozzarella cheese, shreddedShred from a block for best melting - low-moisture mozzarella preferred
- 1 cup provolone cheese, shreddedAdds a slightly sharper flavor that balances the mild mozzarella perfectly
Instructions
Prepare Garlic Butter
Melt 4 tablespoons of butter in a small saucepan over medium heat. Add minced garlic and cook for 1-2 minutes, stirring constantly, until fragrant but not browned. Remove from heat and stir in parsley, Italian seasoning, salt, pepper, and red pepper flakes. Set aside.
Mix Chicken Filling
In a medium bowl, combine the shredded chicken with half of the garlic butter mixture (about 3 tablespoons). Toss well to coat the chicken evenly. The chicken should be glistening with the aromatic garlic butter.
Assemble Sandwiches
Lay out 4 slices of bread on a clean work surface. Divide the garlic butter chicken mixture evenly among them, spreading to the edges. Top each with ¼ cup mozzarella and ¼ cup provolone cheese. Place the remaining bread slices on top and press down gently to compact the sandwiches.
Toast the Sandwiches
Heat a large skillet or griddle over medium heat for 2-3 minutes. Melt the remaining 2 tablespoons of butter. Brush the outside of each sandwich generously with the remaining garlic butter mixture. Place 2 sandwiches in the skillet (don't overcrowd) and cook for 3-4 minutes per side, pressing down gently with a spatula every 30 seconds, until deep golden brown and the cheese is fully melted. Cover with a lid for the first 2 minutes of cooking on each side to help melt the cheese. Repeat with remaining sandwiches.
Serve
Remove sandwiches from heat and let rest for 1 minute to allow the cheese to set slightly. Cut diagonally with a sharp knife and serve immediately while hot and the cheese is still stretchy. Garnish with extra fresh parsley if desired. Serve with pickles, chips, or a side salad.
Recipe Notes & Tips
Storage
Store leftover garlic butter chicken mixture separately from bread in an airtight container in the refrigerator for up to 3 days. Assemble and toast sandwiches fresh for best texture. Already-toasted sandwiches can be refrigerated for 2-3 days and reheated in a skillet over medium heat for 2-3 minutes per side or in a 350°F oven for 10 minutes.
Serving Suggestions
Serve with crispy dill pickle spears, kettle-cooked potato chips, a simple mixed green salad with balsamic vinaigrette, or a cup of tomato basil soup for dipping. For a heartier meal, pair with sweet potato fries or coleslaw. The richness of the sandwich benefits from acidic or crunchy sides.
Variations
Add sautéed spinach or baby arugula for extra nutrition. Try caramelized onions for sweetness, or roasted red peppers for a smoky note. Swap provolone for fontina or Gruyère for a more sophisticated flavor. For extra richness, spread a thin layer of pesto or sun-dried tomato spread on the inside of the bread before assembling. Make it spicy by adding sliced jalapeños or a drizzle of hot sauce to the chicken mixture.