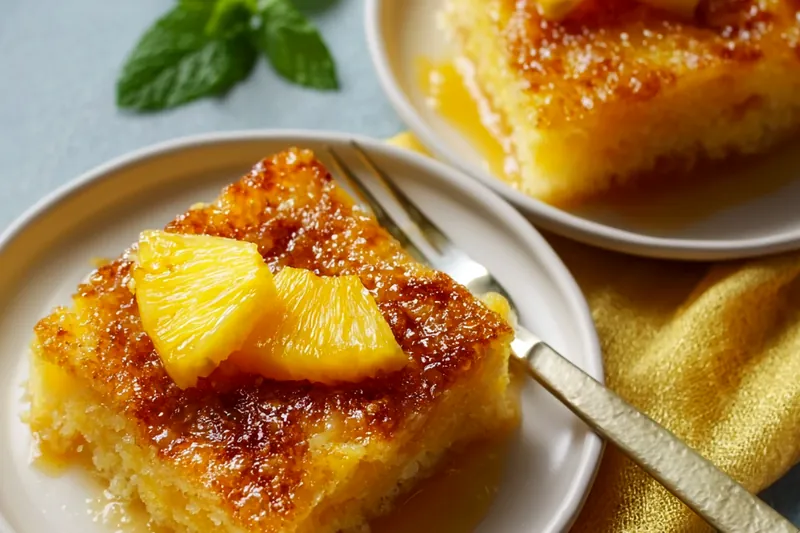
Classic Pineapple Upside-Down Cake
This Classic Pineapple Upside-Down Cake is the ultimate retro dessert that never goes out of style. With caramelized pineapple rings, a glossy brown sugar topping, and incredibly moist buttery cake, it's a showstopper that's surprisingly simple to make. The magic happens when you flip the cake to reveal that gorgeous golden top.

The Secret to Perfect Caramelization
The hallmark of an exceptional Pineapple Upside-Down Cake is that gorgeous, glossy caramel layer that coats the pineapple rings. The key is using the right ratio of butter to brown sugar and allowing it to melt together before adding the fruit. Light brown sugar creates a milder, more buttery caramel, while dark brown sugar produces a deeper molasses flavor. I prefer light brown sugar for this recipe because it lets the pineapple's natural sweetness shine through without overwhelming it.
The timing of the flip is crucial for achieving that perfect caramelized top. If you flip too early, the caramel will be too liquid and run off the sides. Wait too long, and it will stick to the pan. The sweet spot is exactly five minutes after removing from the oven. During this brief cooling period, the caramel thickens to the ideal consistency while remaining fluid enough to drip beautifully down the cake sides.
💡 Professional Tip
Always use canned pineapple rings in juice (not syrup) and drain them thoroughly by patting with paper towels. Fresh pineapple contains enzymes that can break down the cake's structure, and pineapple in heavy syrup makes the topping overly sweet.
Frequently Asked Questions
Yes! You can bake this cake up to 1 day ahead. After it cools completely, cover it loosely with plastic wrap and store at room temperature. The caramel may soften slightly, but the cake actually tastes even better the next day as the flavors meld. If you need to make it further in advance, refrigerate for up to 3 days, but bring to room temperature before serving for the best texture.
While canned pineapple rings are traditional and recommended, you can use fresh pineapple if you prefer. Core a fresh pineapple and cut it into 1/2-inch thick rings. The texture will be slightly firmer, and you may need to adjust the sugar since fresh pineapple varies in sweetness. However, canned pineapple provides more consistent results and the juice gives better moisture to the cake.
Sticking usually happens if the cake cools too long before flipping (more than 5-7 minutes) or if the pan wasn't properly prepared. Make sure to use enough butter in the bottom of the pan and run a knife around the edges immediately after removing from the oven. If your cake does stick, you can carefully loosen any pieces and press them back onto the cake - the caramel acts like glue!
For the best flavor and texture, stick with real butter rather than margarine or oil. Butter provides richness and helps create that authentic caramelized flavor in the topping. If you must substitute, use European-style butter with higher fat content for an even more luxurious result. Coconut oil can work in a pinch but will add a subtle coconut flavor.
The cake is done when a toothpick inserted into the center (avoiding the pineapple) comes out clean or with just a few moist crumbs. The top should be golden brown and spring back when lightly pressed. The edges will pull away slightly from the pan sides. Visual cues are more reliable than exact timing since ovens vary - start checking at 38 minutes.
This cake is delicious on its own, but it becomes absolutely decadent with a scoop of vanilla ice cream or a dollop of freshly whipped cream. The cold, creamy element contrasts beautifully with the warm caramel. For an adult twist, try serving with rum-spiked whipped cream. A cup of strong coffee or vanilla chai tea also pairs wonderfully with the sweet, fruity flavors.
Absolutely! Use a muffin tin and reduce the baking time to 18-22 minutes. Cut the pineapple rings into quarters or use crushed pineapple. Place about 1 teaspoon of butter and 1 tablespoon of brown sugar in each cup, add a pineapple piece, then fill 2/3 full with batter. These individual cakes are perfect for parties and flip beautifully onto small serving plates.
Store leftover cake covered at room temperature for up to 2 days or refrigerated for up to 4 days. The caramel topping may soften when refrigerated but will still taste delicious. You can gently reheat individual slices in the microwave for 15-20 seconds to restore that fresh-baked warmth and soften the caramel. Avoid freezing, as the pineapple texture changes significantly when thawed.
Recipe Troubleshooting Guide
Soggy Bottom Cake
Problem: The bottom of your cake is wet and dense instead of light and fluffy.
Solution: This happens when the pineapple releases too much moisture. Make sure to drain the pineapple rings very thoroughly and pat them completely dry with paper towels before arranging in the pan. Also, don't let the cake cool too long before flipping - the steam needs to escape. Using pineapple in juice (not syrup) helps reduce excess liquid.
Burnt Caramel Topping
Problem: The brown sugar topping turned dark and bitter instead of golden and sweet.
Solution: Lower your oven temperature by 25°F and tent the cake with aluminum foil halfway through baking if the top is browning too quickly. Dark pans absorb more heat and can cause over-browning, so consider using a light-colored metal or ceramic pan. Also ensure your oven temperature is accurate by using an oven thermometer.
Dense, Heavy Texture
Problem: Your cake turned out dense and heavy instead of light and tender.
Prevention: Overmixing the batter is the most common cause of dense cake. Once you add the flour, mix just until no streaks remain - don't beat it. Also make sure your butter and eggs are at room temperature so they incorporate smoothly. Finally, measure flour correctly by spooning it into the measuring cup and leveling off, never packing it down.
Cake Won't Release from Pan
Problem: The cake stuck firmly to the pan when you tried to flip it.
Recovery: This usually means you waited too long to flip. The ideal time is 5 minutes after removing from the oven - set a timer! If it still sticks, place the pan back on low heat for 30 seconds to re-melt the caramel slightly. For future cakes, run a thin knife around the edges immediately after removing from the oven, before the cooling period.
Dry Cake Texture
Problem: The cake came out dry and crumbly instead of moist.
Prevention: Overbaking is usually the culprit. Start checking for doneness at 38 minutes rather than waiting the full time. Remember that the cake continues cooking slightly as it cools. Also ensure you're measuring ingredients accurately - too much flour or too little liquid will dry out the cake. Using room temperature ingredients helps them blend smoothly and create a more tender crumb.
Flavor Balance Issues
Too Sweet: If the cake is too sweet, reduce the granulated sugar in the batter by 2 tablespoons and use pineapple in juice rather than syrup. You can also add 1 teaspoon of lemon zest to the batter for brightness.
Too Salty: If there's a salty aftertaste, make sure you're using unsalted butter for both the topping and the cake. If you only have salted butter, reduce the salt in the recipe to 1/8 teaspoon.
Bland: If the flavor seems flat, increase the vanilla extract to 1 1/2 teaspoons and add 1/4 teaspoon of almond extract. A pinch of cinnamon in the batter also enhances the pineapple flavor beautifully.
Choosing Quality Ingredients for Best Results
While this cake doesn't require exotic ingredients, using quality basics makes a noticeable difference. Real butter (not margarine) provides authentic flavor and helps create that luscious caramel topping. I always use unsalted butter so I can control the salt level precisely. For the cake itself, use fresh baking powder - if yours is more than six months old, it may have lost potency, resulting in a denser cake.
When selecting canned pineapple, look for rings packed in their own juice rather than heavy syrup. The natural juice provides enough sweetness without making the topping cloying. Dole and Del Monte both make excellent options. For the brown sugar, light brown creates a more delicate caramel flavor, while dark brown sugar gives deeper molasses notes - both work beautifully, so choose based on your preference.
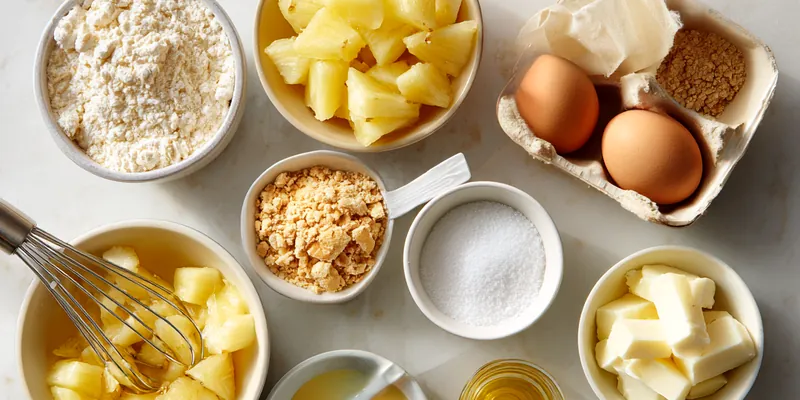
Essential Ingredient Notes
- Pineapple Rings: Choose canned pineapple rings in juice (not syrup) for the best flavor balance. Drain thoroughly and pat completely dry with paper towels to prevent a soggy bottom. You'll need 7-9 rings for a 9-inch round pan.
- Brown Sugar: Light brown sugar creates a milder, butterscotch-like caramel, while dark brown sugar produces a deeper molasses flavor. Pack it firmly when measuring to ensure the right ratio. Fresh, soft brown sugar is easier to spread evenly over the butter.
- All-Purpose Flour: Measure flour by spooning it into your measuring cup and leveling off with a knife - never pack it down. Too much flour creates a dry, dense cake. If you live at high altitude, you may need to add 1-2 extra tablespoons of flour.

Mastering the Flip Technique
The dramatic flip from pan to plate is what transforms this cake from ordinary to extraordinary. Timing is everything - flip too soon and the caramel runs off; wait too long and everything sticks. After removing the cake from the oven, let it cool for exactly five minutes. During this time, the caramel thickens to the perfect consistency while still remaining fluid enough to cascade down the sides.
To flip successfully, run a thin knife around the edges of the pan immediately after the five-minute rest. Place your serving plate upside down over the pan, then firmly grip both the plate and pan together. In one confident motion, flip them over together. Don't peek right away - leave the pan in place for one full minute to let gravity pull all that luscious caramel down onto the cake. When you lift the pan, you'll reveal that gorgeous caramelized top.
The Perfect Flip
Success lies in timing and confidence. Cool for 5 minutes, loosen the edges, place your serving plate on top, and flip in one smooth motion. Leave the pan in place for 60 seconds before lifting to allow the caramel to fully release. If any pineapple sticks to the pan, simply place it back on the cake - the warm caramel will hold it in place.
Classic Pineapple Upside-Down Cake
📋 Ingredients
Caramel Topping
- 1/4 cup (4 tablespoons) unsalted butterMelted in the baking pan - creates the caramel base
- 2/3 cup packed light brown sugarSprinkle evenly over melted butter for even caramelization
- 1 can (20 oz) pineapple rings in juice, drainedPat dry with paper towels - you'll need 7-9 rings
- 8-10 maraschino cherries (optional)Place in center of each pineapple ring for classic look
Cake Batter
- 1 1/2 cups all-purpose flourSpoon and level - don't pack the measuring cup
- 1 1/2 teaspoons baking powderMake sure it's fresh (less than 6 months old)
- 1/4 teaspoon saltEnhances all the flavors in the cake
- 1/2 cup (1 stick) unsalted butter, softenedRoom temperature is crucial for proper creaming
- 3/4 cup granulated sugarCream well with butter until light and fluffy
- 2 large eggs, room temperatureAdd one at a time, beating well after each
- 1 teaspoon vanilla extractPure vanilla gives the best flavor
- 1/2 cup whole milk, room temperatureWhole milk creates the most tender crumb
Instructions
Prepare the Topping
Preheat your oven to 350°F (175°C). In a 9-inch round cake pan or 9x9-inch square baking dish, melt 4 tablespoons of butter over low heat or in the oven. Sprinkle the brown sugar evenly over the melted butter. Arrange pineapple rings in a single layer over the brown sugar, placing a maraschino cherry in the center of each ring if desired.
Mix Dry Ingredients
In a medium bowl, whisk together the flour, baking powder, and salt. Set aside. This ensures even distribution of leavening agents throughout the cake.
Cream Butter and Sugar
In a large mixing bowl, beat the softened butter and granulated sugar together using an electric mixer on medium speed for 3-4 minutes until light and fluffy. Add eggs one at a time, beating well after each addition. Mix in the vanilla extract.
Combine Wet and Dry
Add the flour mixture to the butter mixture in three additions, alternating with the milk, beginning and ending with the flour. Mix on low speed just until combined after each addition. Do not overmix, as this can result in a tough cake.
Bake the Cake
Carefully pour the batter over the pineapple topping in the pan, spreading it evenly to the edges. Bake for 38-42 minutes, until a toothpick inserted into the center comes out clean and the cake is golden brown. The edges should pull slightly away from the pan.
Invert and Serve
Remove from oven and let cool in the pan for 5 minutes only. Run a knife around the edges to loosen. Place a serving plate upside down over the pan, then carefully flip both together. Leave the pan in place for 1 minute to allow the caramel to drip onto the cake, then gently lift off the pan. Serve warm or at room temperature.
Recipe Notes & Tips
Storage
Store covered at room temperature for up to 2 days or refrigerate for up to 4 days. The caramel topping may soften when refrigerated. Reheat individual slices in the microwave for 15-20 seconds for that fresh-baked experience. Not recommended for freezing due to pineapple texture changes.
Serving Suggestions
Serve warm or at room temperature with vanilla ice cream, freshly whipped cream, or rum-spiked whipped cream. Pairs beautifully with coffee or vanilla chai tea. For special occasions, drizzle with additional caramel sauce or dust with powdered sugar.
Variations
Try using crushed pineapple instead of rings for a more rustic look. Add 1/4 teaspoon cinnamon or 1/4 teaspoon almond extract to the batter for extra depth. For a tropical twist, add 1/2 cup shredded coconut to the batter. Make mini versions in muffin tins by reducing baking time to 18-22 minutes.